tailwind + daisyui 开发初始化
作者:matrix 发布时间:2022-10-18 分类:零零星星
环境:
Mac + vscode + docker
创建项目和容器镜像
基于nodejs的docker镜像安装tailwindcss,daisyui
新建目录tailwind-project
$ mkdir -p ./tailwind-project/src/   ./tailwind-project/dist/

$ cd ./tailwind-project/

$ docker run -it --rm -v $(pwd):/data -w /data node:latest  sh -c 'npm install -D tailwindcss tailwindcss-cli ;npm i daisyui;npx tailwindcss-cli init;bash'
install -D 参数表示dev
daisyui为组件库 可取消
显示「Created Tailwind css config file: tailwind.config.js」 即创建成功
安装成功的npm包:
root@4e27e6ae691b:/data# npm list

data@ /data
+-- daisyui@2.31.0
+-- tailwindcss-cli@0.1.2
`-- tailwindcss@3.1.8
配置tailwind.config.js
找到tailwind-project目录的tailwind.config.js文件。
参考配置如下:
// 下面配置为tailwindcss 3.0+版本
// 旧版本配置参数名可能不同
/** @type {import('tailwindcss').Config} */
module.exports = {
  content: ["./src/**/*.{html,js}"],
  theme: {
    extend: {},
  },
  plugins: [
    require("daisyui"),

  ],

  daisyui: {
    themes: ["emerald"],
  },
}
content:待监听的html/js/vue文件路径(Tailwind会自动读取使用的class,输出到output css)
plugins:配置加载UI插件daisyui
daisyui.themes : 设置daisyui的默认主题为emerald
热更新监听
使用tailwindcss命令监听html文件变更,自动输出class的css代码到output.css
npx tailwindcss -o ./dist/output.css --minify --watch
-o参数定义output css输出文件路径
--minify参数启用css压缩
--watch参数启用热加载更新文件
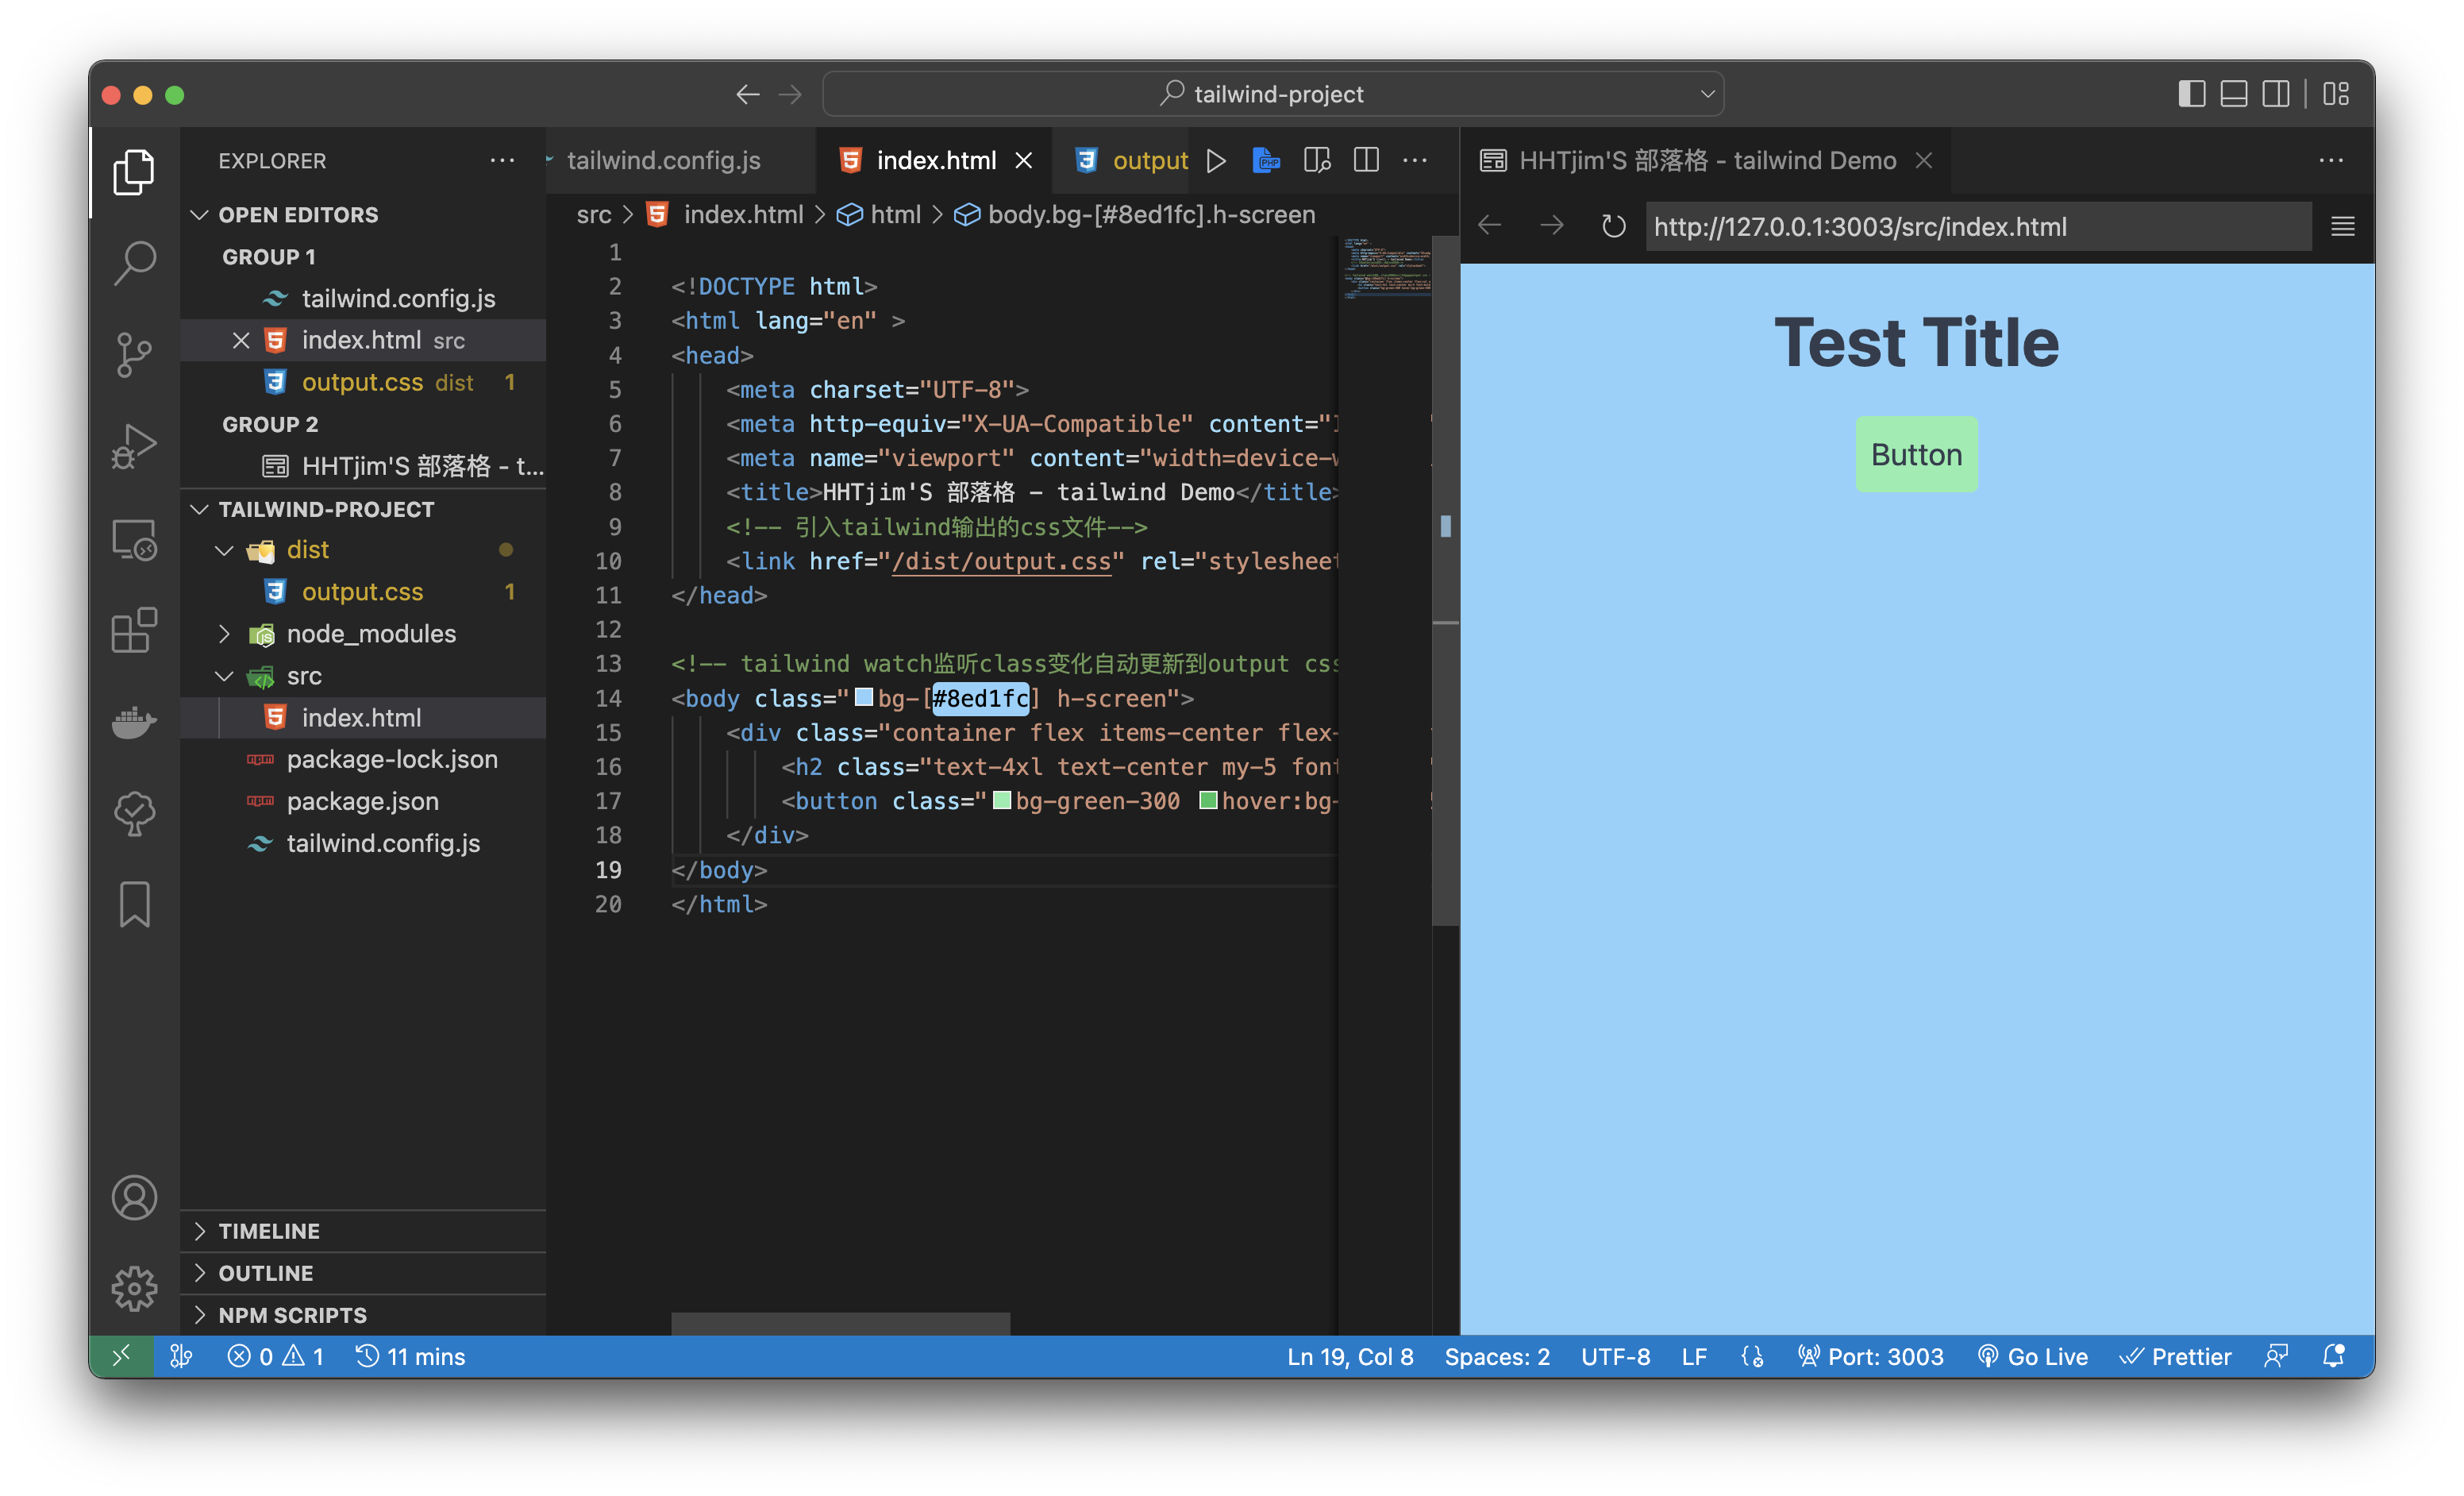
编辑你的html
编辑./src/index.html文件,开始尝试tailwind啦...
<!DOCTYPE html>
<html lang="en" >
<head>
    <meta charset="UTF-8">
    <meta http-equiv="X-UA-Compatible" content="IE=edge">
    <meta name="viewport" content="width=device-width, initial-scale=1">
    <title>HHTjim'S 部落格 - tailwind Demo</title>
    <!-- 引入tailwind输出的css文件-->
    <link href="/dist/output.css" rel="stylesheet">
</head>

<!-- tailwind watch监听class变化自动更新到output css -->
<body class="bg-[#8ed1fc] h-screen">
    <div class="container flex items-center flex-col w-full">
        <h2 class="text-4xl text-center my-5 font-bold " >Test Title</h2>
        <button class="bg-green-300 hover:bg-green-500 rounded px-2 py-2">Button</button>
    </div>
</body>
</html>
vscode插件
tailwindcss官方提供了vscode的开发插件,便于提示class name
https://marketplace.visualstudio.com/items?itemName=bradlc.vscode-tailwindcss
tailwindcss用法要多多参考官方手册了,不过有daisyui也可以更快的输出你想要的控件样式
参考:
https://tailwindcss.com/docs/installation
https://daisyui.com/
https://github.com/komavideo/LearnTailwindCSS/tree/main/Lesson02
简单好用的SLA探活工具 - EaseProbe
作者:matrix 发布时间:2022-10-02 分类:零零星星
SLA探活的需求很广泛,简单的可以自己实现。但是专门独立的探活工具倒是极少~
EaseProbe由GO编写,不需要其他依赖支持直接使用二进制程序运行。
这几天测试用来给api接口、ssl证书、web 200探活,好用~

github仓库
https://github.com/megaease/easeprobe
支持HTTP、TCP、SSH、SSL证书、各种数据库/消息中间件服务探活,和email、SLAck、Discord、Telegram、飞书...的通知。还支持消息通知和定时发送报表,可以自定义分类告警渠道
配置config.yaml
参照官方配置,新建文件config.yaml
配置SSL证书过期检测、WEB HTTP200检测、接口HTTP状态检测:
http: # http探活

    # 默认监控网页HTTP是否为200OK
  - name: "HHTJIM.COM OK"
    url: https://www.hhtjim.com
  - name: "LINK.HHTJIM.COM OK"
    url: https://www.hhtjim.com

    # 监控接口是否返回指定状态码
  - name: link mp3 parse
    url: https://link.hhtjim.com/163/5146554.mp3
    method: GET
    insecure: true
    success_code:
        # 配置允许的状态码范围
      - [200,206] # the code >=200 and <= 206
      - [300,308] # the code >=300 and <= 308
    timeout: 1s # default is 30 seconds

tls: # SSL证书探活

    # 监控网页证书是否临近过期(24小时内触发告警)
  - name: "www.hhtjim.com SSL EXPIRED"
    host: www.hhtjim.com:443
    insecure_skip_verify: true # dont check cert validity
    expire_skip_verify: false # dont check cert expire date
    alert_expire_before: 24h # alert if cert expire date is before X, the value is a Duration, see https://pkg.go.dev/time#ParseDuration. example: 1h, 1m, 1s. expire_skip_verify must be false to use this feature.

    # 监控网页证书是否临近过期(7天内触发告警)
  - name: "link.hhtjim.com SSL EXPIRED"
    host: link.hhtjim.com:443
    insecure_skip_verify: true
    expire_skip_verify: false
    alert_expire_before: 168h

notify: # 告警通知方式

  lark:
    - name: "lark alert service"

        # 配置飞书通知机器人的webhook
      webhook: "https://open.feishu.cn/open-apis/bot/v2/hook/00000-10b1-000000-8949-00000000"

# 全局配置
settings:
  probe:
    timeout: 30s # the time out for all probes
    interval: 1m # probe every minute for all probes

# SLA Report schedule
  sla:
    schedule: "weekly"
    time: "23:59"
    data: "-"
说明:
参照上面注释可自由配置,我这里使用的是飞书通知。也可以其他方式告警~
探活配置参数:
https://github.com/megaease/easeprobe/blob/main/docs/Manual.md#1-probe
告警通知配置参数:
https://github.com/megaease/easeprobe/blob/main/docs/Manual.md#2-notification
开启监控
EaseProbe已经有docker镜像,可以直接一键启停。
# 首次启动
$ docker run -d  -p 8181:8181 --name sla -v $(pwd)/config.yaml:/opt/config.yaml megaease/easeprobe


# 重启
$ docker restart sla


# 关闭
$ docker stop sla
查看状态
访问http://HOST:8181`就能看到web监控面板,且支持api接口http://HOST:8181/api/v1/sla`

附. 飞书BOT创建
这里的告警通知使用的是群自定义机器人webhook,需要使用飞书客户端创建(web端没有找到入口)
- 群设置

- 添加自定义机器人

- 复制webhook地址
参考:
https://mp.weixin.qq.com/s/c73ZPBGoMbqjT-xbRiCJ3g
https://github.com/megaease/easeprobe/blob/main/docs/Manual.md
https://open.feishu.cn/document/ukTMukTMukTM/ucTM5YjL3ETO24yNxkjN?lang=zh-CN